Showing posts with label DIY. Show all posts

Sunday, September 13, 2009

San Diego Trial II - their Tree of Love

Again, this is a more ghetto-fied version of what their actual Pièce de résistance will be. They have requested that guests write a poem or other loving thoughts on pieces of paper to hang on their "tree of love" which they will have prominently displayed at their reception and then later in their home.

Their tree will composed of large manzanita branches. They are still unsure if it will be sandblasted, natural brown red, or spray painted. If they go out and collect them on their own (again manzanita grows like wild here), I think they should spray it a soft gold. If they buy it, I like the sandblasted.

Here is a pretty good tutorial of how to make your own from the WeddingChicks.

Sandblasted Manzanita


I started messing around with this just to get the feel of what it is like to work with branches. I collected some dead branches from off the side of the road (near the florist coincidentally). I can tell you this, one of the reasons why manzanita is so popular for floral decor is that it is so strong. These dead branches - not so much - I have crap all over my car.

So again, just screwing around, I hung some green amaranthus on them. The amaranthus is really cheap here at $5 for 5 stems, which I used here. Side note - I actually had a beautiful red amarnathus in my garden, but my damn landlord chopped it down. Oh well.


Again, this isn't the same type of branch, not the same type of vessel. But I think I like it better with orchids on them. These are with my cheap dollar store orchids.


If they decide to go for the orchids, I think we will just order yellow and/white dendrodiums as they are so much cheaper than the other orchids (anywhere from $15-30 for 75ish blooms). These fake ones are supposed to be mokara orchids, which I admit are a more interesting flower to me. Sam's club is selling them super cheap, so you never know.


For a tutorial on how to hang and conceal the amaranthus flowers, see this article from wonderful Nettleton Hollow blog.

Saturday, September 12, 2009

More florals - a trial for a San Diego wedding

One of my friends from Miami is getting married in his home town of San Diego. He is a great, chill, outdoorsy fellow - very San Diego. Well, I offered my floral services to him and his lovely fiancee and they were so excited to have something off their plates.

The wedding, which will be in a month, will be held on the beach followed by a reception at a nearby home.

For the ceremony, they will have manzanita and/or driftwood branches lining the aisle,


as well as vases hanging on shepherds hooks. Here is a trial go at the ceremony vases
They are a white hydrangea bloom and two marigolds with green amaranthus hanging down.


The bride requested that her bouquet include alot of texture and a variety of different blooms. She also had a preference for yellow and white. Here is what I dreamed up with some excess ribbon leftover from my wedding (I personally dislike this ribbon).


I used white spider mums, yellow button mums, white carnations, and yellow marigolds. This is about half the size I will make for her actual bouquet. I will also add in yellow cockscomb and probably switch out the marigolds with yellow carnations (the marigold stems just don't hold up well).


As for the groom, I suggested rosemary and they loved the idea of it. Here is what I came up with, and I hope they love it as much as I do. It is just two sprigs of rosemary from my garden and three tiny yellow button mums. It smells lovely and I think it will accompany her bouquet very well.


For the reception, they have beautiful metal rectangular containers, that they plan to fill with succulents like the ones shown and rocks.


To give it a little more zing and color, I think we are going to add a sweeping small manzanita branch covered with some smaller orchids. Here is my inspiration, using my very own succulent plant garden, a branch from one of my juniper trees, and some dollar store fake orchids - yes it is a ghetto-fied trial

On the tables, they will also have some smaller vases with succulents for their guests to take home


All in all, I think this is going to be a fabulous looking wedding, which will be minimizing the amount of cut flowers, but adding in lots of texture with living plants and branches (manzanita grows like wild in Cali).

More soon on their Pièce de résistance !

Monday, August 10, 2009

Florals on a budget - cheap flowers

When I was planning our wedding, I knew that I had to DIY the florals. Florists just charge way too much for stuff I know what do. Still the flowers and vases themselves can be costly. I did a fair share a research to find well priced flowers. What I found was that online wholesalers are no deal. I actually got better prices getting quotes from local florists (plus no delivery fee). For my own wedding, I used a local flower wholesaler. Miami, as the gateway from the Central and South American floral farms, is filled to the brim with flower wholesalers. But most large cities have flower wholesalers that will sell to the public. If not, get a quote from your local florist and make sure to ask for a better price since they aren't arranging them for you. Other well priced places include Costco (call and place the order with your local store) and your local grocery store.


Now on with doing your floral centerpieces on the cheap. What I have learned is that cheap flowers look, well, cheap when arranged with other cheap flowers. But when showcased on their own, they can be the stars and become stunning. See, for example, the following....


Carnations credit


Poms or mums
credit


Even baby's breath

The extra plus for working with a monoculture of flowers is that your save time dealing with the placement of specific flowers. Instead there is more emphasis on shape, color, and texture


Next is the vessel. Buy cheap vases. Dollar Tree and Ikea have great ones. You can always cover them in paper and ribbon for pizzaz.


Avoid buying online, they will get you with expensive shipping.

Or just make your own vases, by repurposing containers.

Ball canning jars

credit

Or cut some of your wine bottles. For tutorial see here

credit


Also, for an additional bit of decor, you can always add a punch of color underneath the vase. like these from etsy seller darlingdamask


Sure, you could buy them or always make these yourself. But time and money can be an issue (or sewing prowess in my case). But, why not rent awesome napkins from your local linen company. They usually rent for 50 cents each and come in a range of colors, textures, and fabrics. If you aren't renting anything else from them, pick them up and just mail them back.

Thursday, April 2, 2009

"My husband"

I just love saying that. I went to a shindig (yes, I used that word) tonight and got to introduce Ralph as what he really is. It was cool.

But, I still don't have weddings completely out of my head since I am currently trying to unearth all our leftover wedding stuff.

Anyway, as I was talking to one of my moms today, it occurred to me that I perhaps I should recount what my wedding day was like...


All pictures are from my amazing girl Jade of
Uplift Photography.


7:15 am: woke up 30 minutes early. Immediately begin making boutonnieres in bed. I remember how much I hate to wire orchids. Am somewhat stressed at how non pretty they are.


8:15 am: Meet Ralph in lobby for quick breakfast. We are pretty relaxed.

8:45 am: Start making corsages, which go by really quickly. Very relaxing.


9:20 am: Jade comes by to keep me company and take some shots. I start making Donna's and my bouquet.


10:30 am: My mom picks me up for my 11am hair appointment.

11:00 am: I am waiting and waiting with people ignoring me at the salon.

11:20 am: Finally meet my stylist, who immediately pegs me as a bride. I lie and say my updo is for my mom's b-day gala.

12:50 pm: Stylist finally finishes my updo after rushing through the end. I have to repeatedly tell her to do something about my frizzies. I wish that she knew I was a bride, so she would know that my hair is really important. Why did I bother saving a buck? Then I remember that it is a $100 hairdo. I am not cheap, it is just an overpriced hairdresser!

1:00 pm: I get to my makeup appointment just in time. Filberto is totally ready for me and has everything laid out for me.

1:10 pm: I notice how crappy it is outside and it starts raining. I think it will pass.

1:30 pm: I get THE call. The venue calls my cell to determine if we should move the ceremony indoors. I have 15 minutes to give them an answer. I immediately call Ralph, who is miffed at having to give our decision so soon. Many phonecalls occur about this (Filberto is super cool and understands). Ralph then calls in a panic as he gets kicked out of his hotel room. Massive headache sets in.

2:55 pm: I get back to the hotel, a little over 3o minutes late. I am completely unshaven and have NO time to take a mini shower. I dry shave my underarms. I am totally mortified that I have forgotten to take care of this simple task, but know that Ralph will not be surprised or upset.

3:15 pm: Photographer and videographer arrive in my room. I tie the ribbons on the bouquets. I have a hard time with mine and tie it over and over. I am trying to stay calm. I think I get a few more calls about moving everything inside.


3:40 pm: Jade comes over and helps me put my dress on. I didn't even think I would need help with this - duh!


4:10 pm Ralph and I take pictures in the hotel and wet garden. I feel better with him by my side, but still with massive headache. I need to drink water desperately.

I'll wait to detail the rest of the day tomorrow or so....

Monday, February 23, 2009

I gave in to the DIY world of weddings

I told myself that I would try to keep things simple, but man, I got sucked in. I told myself that I did not have to print on a piece of paper what was going on during our ceremony (aka The Ceremony Programs), that it was a waste of paper. I mean, certainly people have been to a wedding before and generally know what is going on. But then, I thought, hmmmm... there are an awful lot of women here, people are going to wonder who is who, and for that matter, who is that girl reading that poetry, and what is she reading? And I thought, that some of those moms might want a keepsake from the wedding. And then I thought, well it is just one more thing, it won't take long to make. Hmph!

I also told myself that a decorated aisle runner was totally unnecessary. I mean, what do you do with it when you are done? Then I met our DOC a few weeks ago and I broke the news to her.... (a) we are using basic banquet chairs without chair covers (shutter), (b) we are not having an arch, (c) we are not decorating anything for the ceremony, and finally (d) that includes the aisle runner.

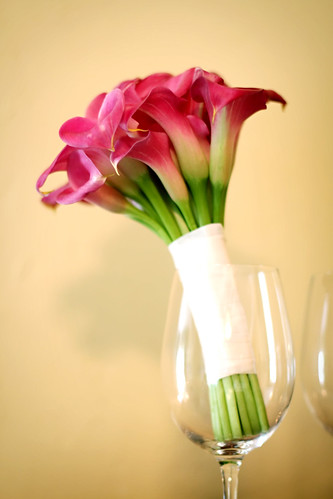
See, look how pretty our ceremony site is without decorations and stuff.


It was only D that made her slightly downtrodden. So, since I had already made an emergency flight back to Miami to take care of wedding business, I decided to decorate that damn aisle runner the morning of my flight home back to CA.

And so, here are my instructions for other brides that don't feel like shelling out $80+ on one...

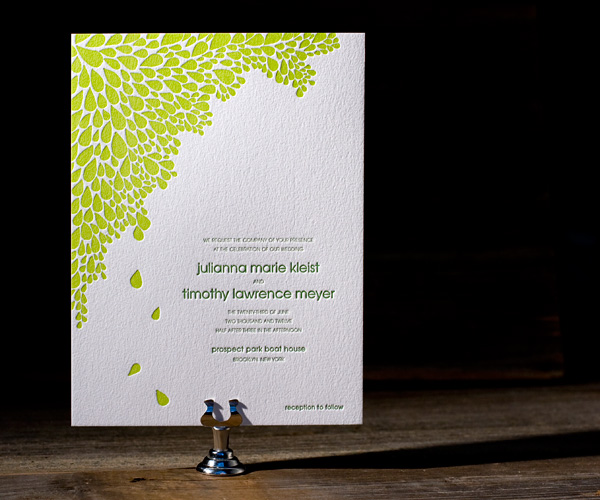
(1) Make your design. I used powerpoint to make this...

(2) Measure the width of your aisle runner to determine the size of your finished monogram. At first, I thought it should be 1/2 the width of the aisle runner - WRONG. That was way too small. I would say about 2/3 the width is good.

(3) Resize your design in your program. For Powerpoint, go to File --> Page Setup and enter your correct dimensions. It should automatically resize everything to scale. I then saved the file as a PNG file (I really don't know why, but I did)

(4) Get it to a printer friendly program. For me, that was Excel. I went to Insert --> Picture and inserted that PNG file into there. Then I printed in grayscale. It will print in mulitple pages (I couldn't get Powerpoint to do this).

(5) Cut the pages, align, and tape them together

This is the smaller version that I ended up scrapping


(6) Place the taped pages under the runner and secure well with tape that you have predetermined to be removedable without damaging the runner.

(7) Using a toothpick, outline the runner with your paint. I used craft paint from Michael's. This is kinda nessesary to have a nice finished edge.

(8) Fill in with a brush, if you have a steady hand. Otherwise fill in with the toothpick. I luckily have a steady hand.

The finished product

(9) DO NOT SPILL IT ON THE RUNNER! If so, we found that blotting with concetrated all purpose cleaner (Mrs. Meyers) and then LIGHTLY painting over it with Whiteout worked ok.

We fixed it pretty well

(10) Remove the paper from underneath the runner. The question really should be when should you do this. We waited until the paint was dry to the soft touch, however, the paper stuck to the aisle runner and was a pain to remove. If you remove it while it was wet, I am afraid that the paint will stain anything else that is left underneath it while it dries.

(11) If you are like me... thank you mom profusely. Between the two of us it took us a good 4.5 hours to outline, paint, and then figure out how to fix our boo boos.

Total cost was $16....~$11 for the runner, $2.25 for paint (which I already owned but was in CA), $2.00 for a thin brush, and, of course, the bonding time with mom was priceless. I also got all these supplies at Michael's when they had 40% off coupons (the trick is that you print out multiple ones and make your family come with you).

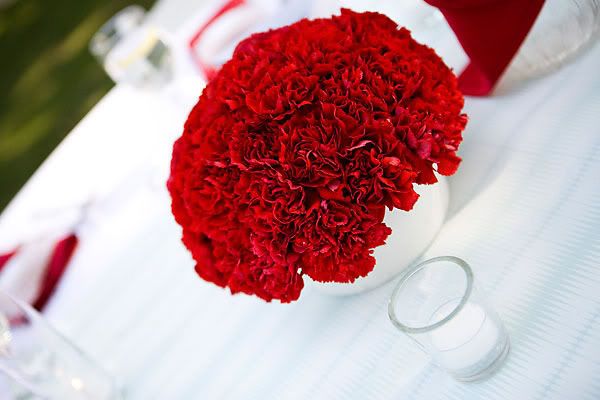
So what will do with this thing? Well I decided that we will have a little decor in there. How about a few rose petals down the sides of the aisle. Sorta like this.....

Yes, I am a total sucker!

Monday, January 12, 2009

Invite Sneakpeek

This is all you get....

Sunday, January 11, 2009

Just an update

I love my dress. They really do wonderful work at Amy Kuschel and have just been awesome. My lovely girl Jade took a zillion pictures and it was obvious to everyone there at the store that she is a pro photographer - they were loving her pictures. There was even an exchange of business cards - too funny. Anyway, Jade helped us out so much in so many ways. She is in arts and crafts pro herself and was great to have my friend by my side. Thanks so much Jade - YOU are the best.

Wednesday, January 7, 2009

It is just paper!

After we got engaged, and I got immersed into all things wedding, I drooled over the pretty invitations that people had. It is just paper, I know. But invitations have come a long way since I was a flower girl. Look at these pretties...


The cost of pro invites has also astronomically increased over the years. And to make matter worse, the cost of recycled paper invites is astounding!!! So this is something I thought that I would DIY from the get-go. Sure, Target, Michaels, et al have print your own invites in a box, but I had hoped that we would have some more unique, recycled invitations.

I obtained my gocco (that Ralph renamed the go go) before I was even engaged and so I pretty much knew that we would screenprint our invites with them.

I did a cost analysis a long time ago for DIY paper supplies at the famed Paper Source and found that if we did the traditional invite suite (an invite card, an RSVP card and envelope, within an inner envelope, all encased in an outer envelope), it really doesn't save us any money and uses up alot of unnecessary paper.

So, we decided to pare back and just include an invite card and envelope. I was able to get pretty recycled paper envelopes for a very reasonable cost and heavyweight cardstock to elimate the need of layering pieces of paper upon paper. We decided to forgo the RSVP cards altogether and just do online RSVP from our wedding website. Even the elders on my side of the family are internet savvy. No inner envelope either - yeah we are just bucking tradition :-)

Anyway, this really allowed us to save a ton on them, in terms of materials cost, printing cost, and in postage. One of the little tricks I learned is to NOT buy pre-cut cardstock, it is overpriced. Instead we bought all our paper in 8.5*11" sheets and then got it professionally cut by Kinkos. All the extra paper could then be used for other project and crafts.

So in the end, our unique invitations will cost around the same as super simple invites from a place like Costco, except we also were able to also have Christmas cards, thank you cards, and still have enough really cool paper for other a bunch of new projects that I dream up when I go through wedding withdrawl.

Then again, they haven't been made yet. If the design doesn't work out on Saturday, Costco here I come!

Sunday, November 30, 2008

More craftiness!

I can't show too much here, but here is a sneakpeek of what I worked on this evening. After printing another 60 or so pieces of paper, I think I can safely say that I am now ready to gocco our invitations.


Ralph has finally broken his silence and expressed his displeasure with the state of our home from my craft weekend (of course, in a kind, gentle sort of way).

Saturday, November 29, 2008

Having fun being crafty!

Following an extended trip to JoAnn's Fabrics (we had to stop at Mervyns), Emily and I came to my place and started some wedding fun-ness. She made a gorgeous veil for her cousin, complete with silver satin trim.


All is needs is a little pressing on the trim. She made it really quickly too.

As for me, not so much. I goccoed our favor bags - all 125 of them. They are all over our place!

What they will somewhat look like (when I get the correct color riboon):

Monday, November 17, 2008

Sharing some of my attempted craftiness

Poor Ralph, he thinks I am crazy. I have about 10 different DIY projects going on at the same time. Why? Well, I want to have as much done as possible before I leave in December (which would be December 9th!!!).

Some stuff just has to wait to be revealed until the big day. But in the meantime, I will share my latest somewhat finished project. The other day, we were shopping at Target and I was perusing the $1+ section in the front of the store, and found these:


I decided that for $2.50, I could make some nice signs to direct people to our ceremony. I just needed some materials that I had laying around my house. I sanded them down and painted them with some latex paint that I found in our utility closet.


Then it rained on them and they looked pink. I tried another coat - still pink. So, Ralph stepped in and got some flat spray enamel in white. He said he would take care of it - but in the end it was largely all me...


Next I needed to paint on the letters - not an easy feat. So I printed up a design in word. Using a ballpoint pen, I traced over the letters using alot of pressure. This left an imprint that I then followed with the craft paint I used for the escort frames.


The result wasn't perfect, but good enough. I am glad I didn't bother with stencils. I like the imperfect look.

I made two signs for a total cost of $8. Sure it was cheaper than buying them on etsy, but it was a little more time consuming than I would have liked. The only thing I am missing is the correct ribbon.

Oh and I have no idea what I will do with these after the wedding. Maybe flip them over and paint something else on them???